
I hope you are all doing well and that life is treating you kindly. Once again I was very touch and appreciate all your comments about the last post. It really is such a pleasure to have such talented and creative artist enjoy my work. It has been longer then I had hoped, but the new and (I hope) improved library is almost finished.

Before and after pictures
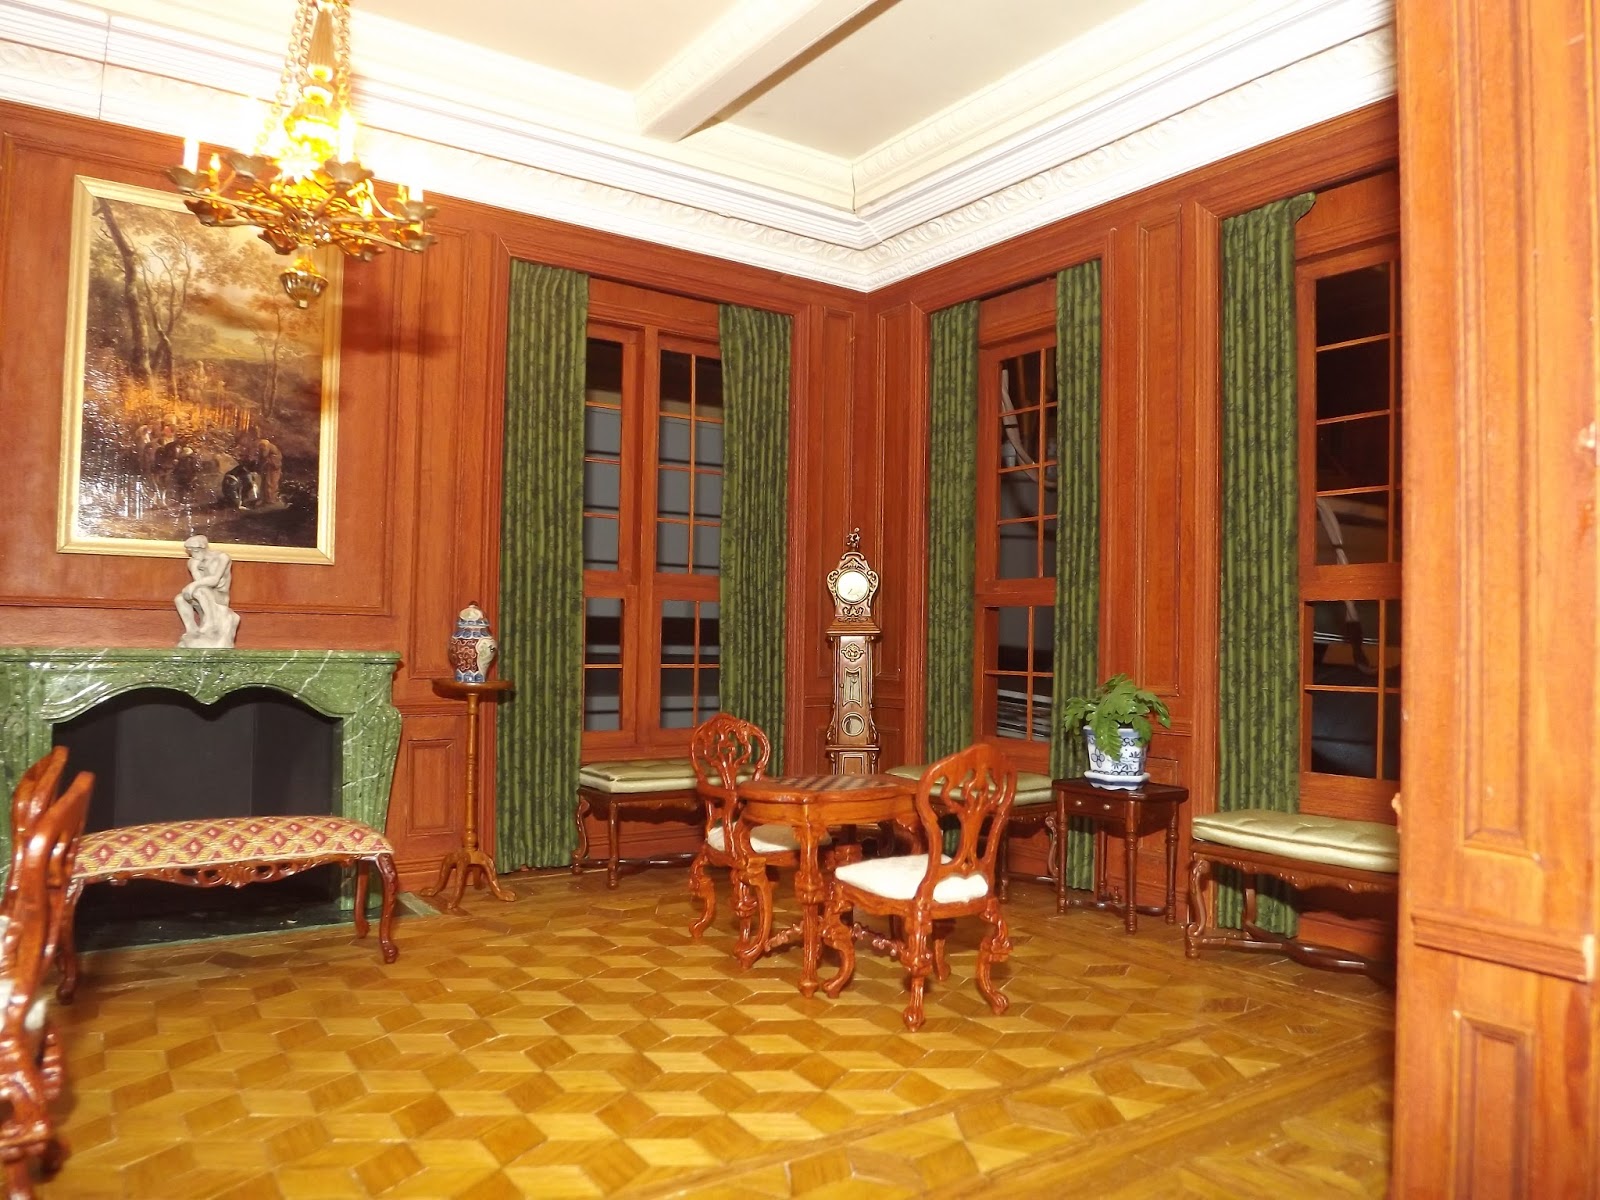
Here is what the library looked like before:


And here is what it looks like today:


Don't get me wrong, I did like the older version very much, but it was so dark and so busy that I just could not imagine it being used for reading. The new version is also 7 inches wider and 2 inches taller which makes it much brighter. A few posts ago I showed you how I made the bookcases and the wall panels, so the next step was...
The Floor
The new floor might look familiar because I used the same design as the old library floor, but without the black detail in the boarder. Here is the old floor...

and here is the new floor...


The hearth is painted 2 ply illustration board to match the faux marble fireplace from Sue Cook I painted. I paid more attention to the direction of the Greek key and the corners of the boarder. I think it looks more realistic without the black, actually.
When the floor was done I glued it down using the Ultimate glue and weighed it down with heavy books overnight. The next step was adding the chair rails and the baseboards to the walls.

You can see in the above picture that I made the bottom of the bookcases just high enough to slip the floor underneath them.
The Ceiling
When the wood trim was done, I flipped the section upside down and worked on the ceiling.

I used real life wood molding to create the coffered effect. It is a 1/2 inch x 1/2 inch square strip, and the inside of each section has a real life size tiny egg and dart molding. Under the coffering, I used a Sue Cook cornice strip. I painted all of the ceiling elements in a buttermilk color acrylic paint, then went over the detail in the Sue Cook molding with white paint. It took me an entire weekend to paint the white, but it really highlights the detail.

This was all done about 3 weeks ago. I still have to add knobs and glass to the bookcase doors and windows, and there are several paint touch ups that need to be done, but overall the room was finished. So why did I wait so long to post...
The Window seats
I showed you the window seats made of double ply illustration board. They were simple to make, but then I had to make cushions for the tops. I cut a piece of single ply illustration board to size and made holes where I wanted to tuft them. In the picture below you see the foam glued to the illustration board on the rights, and the fabric and another piece of foam on the left...the furniture.

I folded over the fabric and glued it down with tacky glue. I then used strong thread to create the tufting. I pushed it through the holes I made, made a very small stich on the top, and pulled down to create the detail.

The fabric I chose was not a natural fiber so it fought me all the way! I had to start these over 3 times before I was happy. In the end I added gold trim and voila!

The furniture refinishing and re-upholstery
Here is a close up of the furniture in the old room...

I really liked the furniture in the old library, but it was mahogany and I hate mixing woods in my dollhouse. Also, the black was too heavy for the look I was going for. I gently took off all the fabric from the furniture but tried not to damage them so they could be used as templates.

I really liked the furniture in the old library, but it was mahogany and I hate mixing woods in my dollhouse. Also, the black was too heavy for the look I was going for. I gently took off all the fabric from the furniture but tried not to damage them so they could be used as templates.
I sanded all the furniture and washed them with a toothbrush dipped in warm water with dishwashing soap, let them dry properly, painted them with antique gold colored paint from Delta Ceramcoat, then faux finished them with burnt sienna oil paint thinned with liquine applied with an old brush. When that was dry I sprayed on 3 or 4 coats of lacquer to keep the paint from scratching. I then cut templates in thin cardboard, glued on some foam, and then glued down the fabric edges.

I hate upholstering with a passion, and I don't think I am the best at it, so I will not go into too much detail. All I can say is my fingertips are still sore from super glue and being poked with pins while trying to hold the fabric in place. However, I did manage to refinish every piece...
The sofas were reupholstered with the same fabric as the window benches...much swearing ensued!

The benches were covered with a silk that was great to use, however the white textured fabric on the chairs kept unravelling as I worked...more swearing!

I had already painted the tops of the mahogany tables to look like marble, so I taped that off with painter's tape and sanded, washes, painted and faux-finished the wood part.

These 2 chairs were unpainted resin chairs from John Hodgson that were given to me as a gift.

I painted them with black Americana paint and highlighted the detail with gold metallic Delta ceramcoat paint. When dry, I sprayed on 6 layers of the lacquer. I used gold silk for the upholstery, but these pieces came with resin molded cushions and the silk just had to be glued on. I used tacky glue which I spread super-thin with toothpicks.

The globe is an inexpensive mahogany base piece with a bright blue, yellow, green and pink globe you've probably seen before. I took the globe and painted it with antique white, red and antique gold Americana paints and, you guessed it, 3 coats of laquer. The table was mahogany finish which I sanded and painted with metallic gold paint and lacquer. I thought of trying gold leaf, but I've seen pictures of gold tables in English country houses and the end result is pretty close. The top is a real piece of marble.
That was it for the furniture I owned. However... The room was quite big and I have always loved the idea of a map table. I did not find any online, so I made it myself.
Map Table

I figured out the size of the table and cut out all the pieces in double ply illustration board and designed it to match the paneling on the walls.

I glued them all together using the Ultimate Glue and gel Super Glue. One side has cubbies for rolled up maps and larger Atlases. I used 1 ich basswood lumber for the depth.

Here you can see pieces of left over wood I used to strengthen the structure. When the glue was dry I faux finished it.

For the map drawers, I used 1/4 inch wood strips that were pre-cut and pre-faux finished. I used leftover molding strips as spacers and just glued them down.

The top is double thick illustration board with a piece of red leather I had lying around. In the next picture you can see that I glued them together and covered the sides of the table top with moldings painted to match.

The final step was to add knobs to the drawers.


I have to say I am really happy with the way the table turned out.
And finally, here are some pictures of the empty room which took so long to do.


As I mentioned, I still have several finishing touches to do, not to mention many books to make to fill up the shelves, but as far as I am concerned the remodeling of this room was well worth it. I just love it and can imagine myself sitting on a chair reading a book and listening to the ocean outside the window.


And that is all for now my friends. My next project is to install the new south wing structure with the rest of the house which means emptying the entire manor and taking it apart... what fun that will be. When the new section is in place I will go back to work on the ballroom.
I know many people are not using blogger anymore, and I myself have a Facebook account which I use mostly to show pictures of the rooms I just finished, but rest assured I love the blog format and plan on continuing posting on here until the Manor is finished...or until I die, whichever comes first!
I send you all a great big hug and wish you all the best,
Giac
Good night...
