
I hope you are all doing well! Once again it has been much longer between posts then I intended. Since my last post I was offered and accepted a new position at work which I am loving, Jo and I celebrated our 6th wedding anniversary, and we have started getting ready to renovate our real life bathroom...all this to say I could not spend as much time on my minis...but I finally finished the Manor's renovation this morning. So here it is, the new and (I hope) improved Entrance and Great Hall:
 |
| View of the Tudor Hall from the Entrance |
 |
| The Entrance |
 |
| The right half of the Tudor Hall |
I love Tudor Style architecture. In my mind these 2 rooms were originally a hunting lodge in Elizabethan times. Centuries later it was eventually given to the owners third son, lord Dewell, when he married. The couple added wings and a floor to the house to make it their main residence, but updated the original Hall instead of renovating it.
Okay that's the back story. These were 2 of the first rooms I finished and every time I looked at them I felt something was wrong with them. Before I go into renovation details, here are the before and after shots:
 |
| Game Room before |
 |
| Tudor Hall left side after |
 |
| Drawing Room before |
 |
| Tudor hall right side after |
 |
| Entrance before |
 |
| Entrance after |
Door frames
After the Dining room renovation (last post) I decided to remake all the door frames on the main floor. the original ones were just door frame molding and were going to have stained glass. Since I wanted the Tudor feel in this room I decided to make stone door frames with a Gothic arch detail.
First I ripped out the old door frames making sure I did not damage the wainscot or the wallpaper. Next I make the top of the door frame with the arch detail out of basswood
 |
| When cutting out opening in basswood I always make a few random cuts in the piece to be removed so that the thickness of the blade does not make the wood split as much |
Next, I made a new frame to fill the opening with 5/8 inch lumber (the thickness of the structure)
 |
| I added a thin molding trim piece to accent the Gothic arch |
To fill the arch, I decided to use strips of door frame molding and fancy cocktail toothpicks .

As you can see I took a basswood backing strip and glued on the toothpicks and door frame pieces making sure they were straight. The next step was adding wood sections to the front of the frame to make it look thicker. I put a thicker strip on the bottom and 3 thinner ones atop it to make it look like the door frame was made from several stone pieces. I added 2 strips of molding on the inside of the door frames and an ogee molding to the top of the arched piece.
.

When all was dry I glued all the section together and covered the entire piece with gesso making sure the spaces between stones did not fill up
 |
| the wood door frame is on the bottom. Gesso just helps fill in some of the wood grain. I used 2 coats, sanding in between with 600 grit sandpaper |
The final step was painting. I used Delta Ceramcoat paints which I applied with 3 different sea sponges. Each coat was added with a coarser piece of sponge. The first coat was Trail tan, the second was sandstone, and the third was oyster. When that was dry I took 10 parts water mixed with 1 part walnut paint, brushed it on, and then used paper towels to sponge it of.
 |
| The finish is not as pale or as shiny in real life. Warning! if you use a dark wash only do it once. If you go over a second time without sealing the first it will actually wash the first coat right off. |
The dark wash is what really makes it look like stone. When dry I sprayed it with a light coat of glaze to keep the dark wash from coming off. I was really happy and put one into place to see the effect...
Fireplaces

The door frame was exactly what I wanted...but the fireplace stood out at me. The marble finish I made was the furthest thing from Tudor. So I took out some double thick illustration board and re cut it. I added a small cameo at the top and used the same faux stone painting technique (Sorry, no picture of that step, but one is coming)
I love big fireplace fenders and decided to make one for the side of the room with the pool table.

In the above picture you can see I took a simple strip of basswood to make the base of the fenders and covered it in pre painted moldings. For the top of the fenders I took apart an inexpensive mini sofa I had and used the carved parts which I painted with black enamel spray paint. I added a small wood strip on the top and voila:

And here is what the fireplace looks like now:

I used black paint and dry brushed the top of the fireplace stone to make it look like it has been used for a long time. The last little detail I added was a family shield at the top of the chimney.
 |
| thank you for the shield big brother |
again I faux stoned it and glued it in place. The fireplace problem was solved, but another problem appeared...
Wainscot
As I have mentioned I am obsessed with English Country Houses. Both rooms has a very simple wainscot, but after looking at old Tudor mansions I decided to make them taller and add a bit of detail.
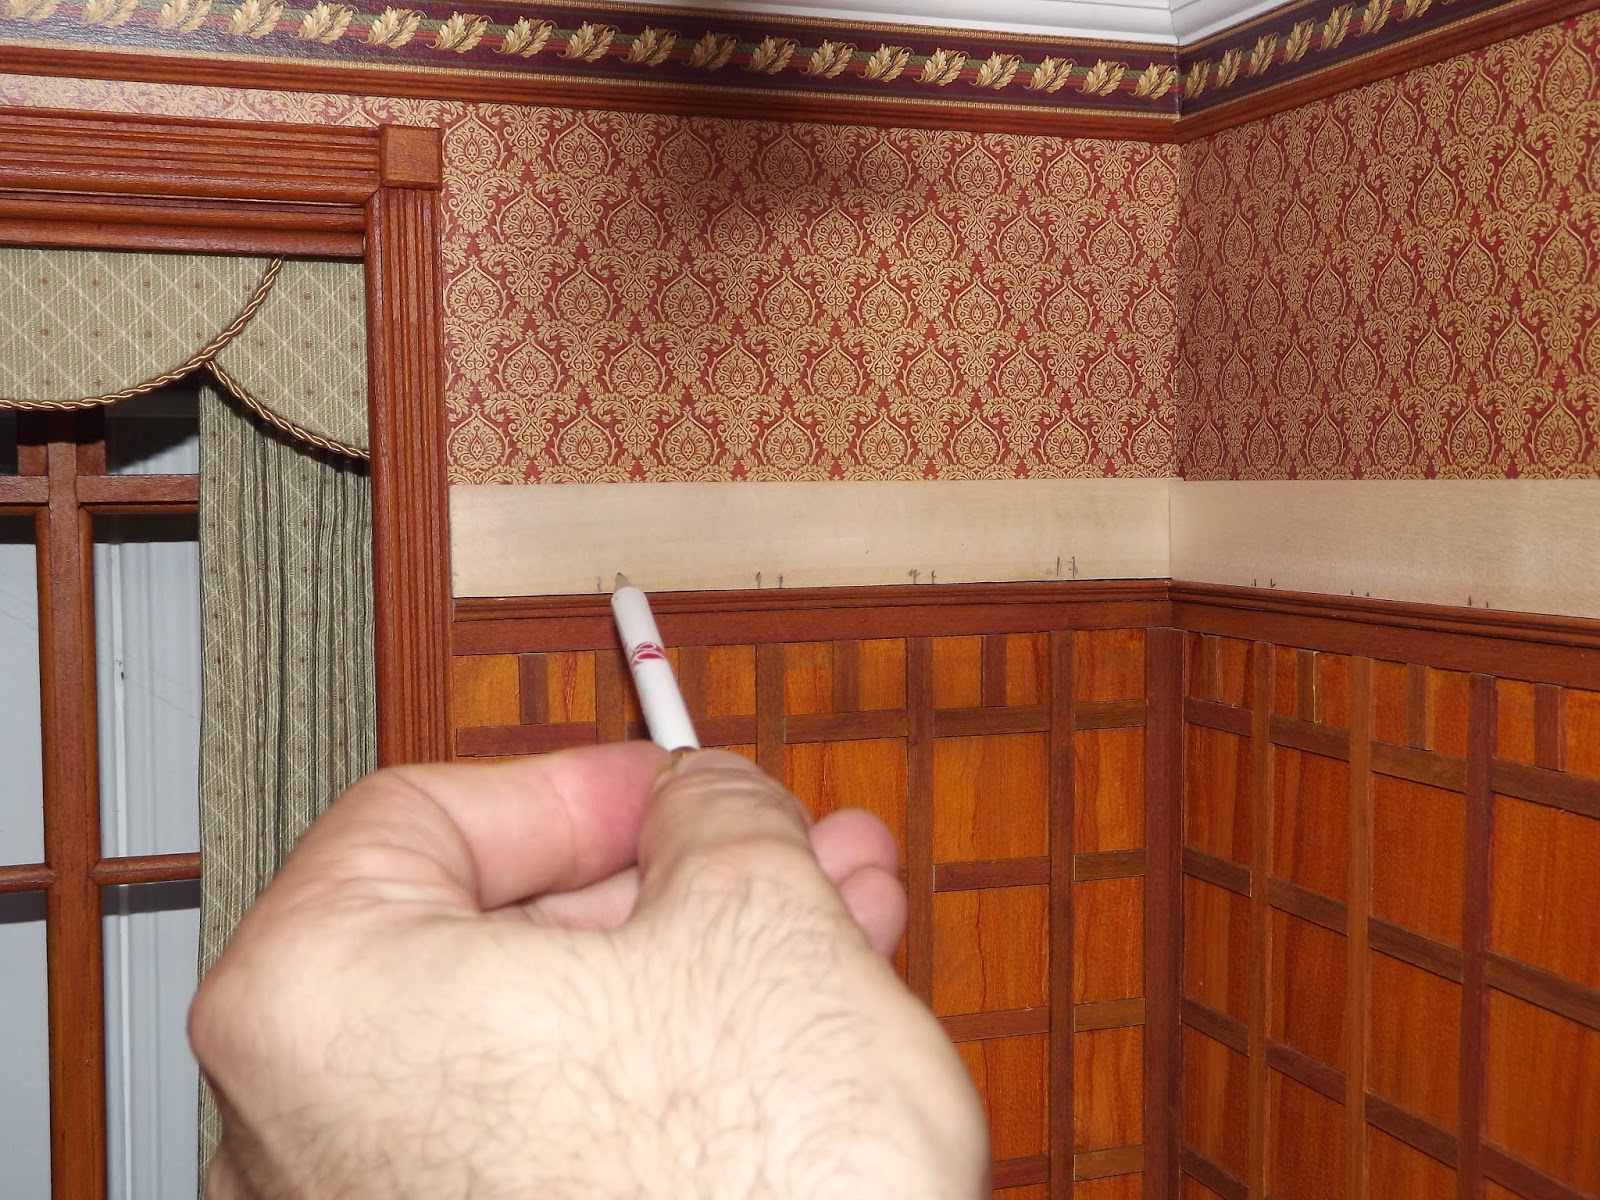
I started by taking a 5/8 wide strip of basswood and laid it atop the wainscot. I made a pencil mark where the long vertical piece reached. This room is 33 inches deep. the sided of my ribs were covered in bruises from reaching in and sliding myself on the structure. When all the marks were made I cut out Gothic arches and stained all the lumber I would need to update the wainscot
 |
| the Gothic arch pieces are at the top. |
In the next picture on the right of the door opening you can see I added door frame molding strips to create a carved detail, and on the left of the door opening you can see the Gothic arch strip glued on.

the final step was adding a top strip of lumber to cover the gaps and a piece of molding to finish it. In the entrance I used 2 more family shields and jewelry pieces to create family crests. I painted them in faux walnut and added gold detail, just to impress anyone who comes into the manor

Stone Floor
And now the real reason I wanted to renovate this room. I absolutely hated the floor:
 |
| Terrible! |
The centre design of the floor was something I purchased. Just like the dining rooms original floor, the white lines you saw through the wood drove me crazy and the panels were coming undone. I tried to come up with a parquet pattern but nothing worked. Long story short, after much research, I decided to rip out the entire floor and replace it with a stone one.
 |
| In this picture you can see the painted stone fireplace piece before installation. |
I painted a small piece of illustration board with the pattern I had in mind. I immediately knew ripping out the wood floor was the right decision. It looked so much brighter and the woodwork was popped instead of disappearing into the room. I took a piece of illustration board and faux stoned it the same way as the other elements in the room...
 |
| Once again, the dark wash is what really creates the stone effect |
then I cut it into 1 1/4 inch squares...
 |
| Yes, I am the person who has to make sure stacked things are perfectly straight or I go a bit bananas |
and finally I made a few illustration board templates and cut out the 4 corners of each title...every last 666 of them. Before I go on to installation a few words of caution:
 |
| It was not really difficult, but when the room you are covering measure 33 inches x 31 inches it becomes very long and tedious |
1- I used double thick illustration board...DO NOT! big pieces are fine but when cutting the small black ones the layers of cardboard came apart...use single ply.
2- I covered the illustration board with gesso... DO NOT! When cutting the tiles and squares the edges over the gesso layer chipped so you saw a lot of white between tiles
3- check your tools! I used a very old straight edge metal square to make sure the squares were perfect. when I was almost done I noticed the square was off by a hair...not much, but just enough that installing the tiles was make difficult because after a few rows the pattern started to go crooked.
Back to installation. I always tell everyone make an illustration board sub floor template of the room, glue on the flooring, then install it in the room. In this case the columns in the middle of the room as well as the nooks and crannies would have made it impossible to hide the gaps between the sub floor pieces, so I glued them directly onto the mdf structure...you guessed it, bruises on my sides for another week.
 |
| The first tile I glued down was right in the centre of the room, then I spread out equally on each side. This helped control and make sure the pattern did not get lost and go out of true |
In the picture above you can see I first glued down all the large stones then filled in the black ones. The black ones vary in size because parts of the floor were of. I made a test piece to see what it would look like grouted, but the grout (Spackle) left a film on the stones. So I did not grout, just went over the finished floor with a good coat of clear floor wax. And here is the finished floor:
 |
| I added molding to the base of the columns to cover any gaps. |
When I decided to go with stone instead of would I was thrilled because I thought it would be so much faster then one of my wood parquet floors...it was just as long and just as tedious! At least the bruises are gone.
And that is all.Not many changes but the floor and wainscot were VERY work intensive. I have not yet hung any artwork because the rooms are really dark and I want to purchase and install sconces before the art goes up.Here are random pictures of the 2 rooms. The Great room has officially been christened the Tudor Hall
 |
| Tudor Hall Left Side |
 |
| Tudor Hall right side |
|
| Tudor hall right side |
 |
| Entrance |
 |
| View from the Ballroom door through the Entrance Tudor Hall, great Dinning Room and the Breakfast room |
And here are a few picture with Flash to better see the details


I think what I love most about the manor, which is true of many English country houses, is that the house is comprised of several styles, not just one. the guests come into the Tudor entrance, see the somewhat Georgian looking ballroom, go through the Tudor hall and end up in the marble filled Great Dining room and can see the chinoiserie breakfast room.
That was the last of the big renovations. This week I plan on getting the mdf panels for the exterior. I also want to make 2 little changes to the kitchen, and I have the bedroom to dress. If my next project takes too long I might just give you a tour of all the rooms of the manor.
Thank you all once again for your incredible feedback. I feel very lucky to have you all following my adventures and I appreciate every comment and constructive criticism you send my way.
Have a wonderful week and once again I will TRY not to take so long between posts.
To all my fellow Canadians, happy thanksgiving!
Big hug to all,
Giac